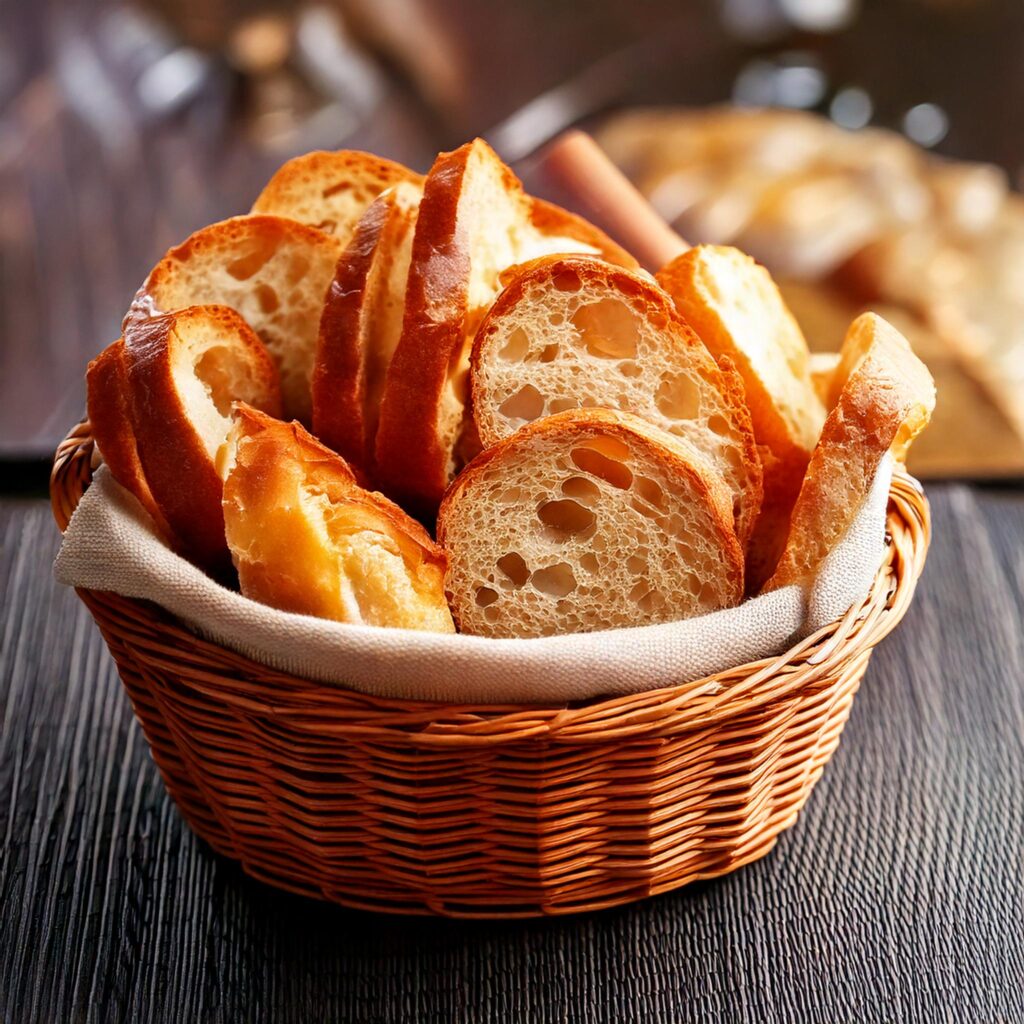
French Bread Recipe Options
Red Onion, Gruyère, and Rosemary Fougasse
Are you trying to spruce up your homemade bread routine? This Red Onion, Gruyère, and Rosemary Fougasse might be your new favourite. With a delightful blend of sweet, salty Gruyère, zesty red onions, and the aroma of rosemary, it’s a home baker’s dream that gives off bakery vibes without all the fuss. It’s guaranteed to get them returning for more (BBC Good Food).
Table of Contents
Ingredients
- Red Onion: 1, chopped nicely
- Gruyère Cheese: 1 cup, shredded fine
- Fresh Rosemary: 1 tbsp, finely chopped
- Basic Fougasse Dough:
- Water: 1 cup
- Yeast: 2 tsp
- Flour: 2 ½ cups
- Salt: 1 tsp
Steps
- Combine water and yeast, letting it bubble up.
- Throw in the salt and flour—knead, knead, knead.
- Mix in the red onion, cheese, and rosemary.
- Shape like a leaf, slicing here and there to give it that fougasse look.
- Bake at a blazing 450°F for 20-25 mins till it shines golden.
Homemade French Bread Recipe Highlights
Ever wish you could bake a loaf like the ones from your corner bakery? Well, it’s not as far-fetched as you think. With this straightforward recipe, you’ll whip up light, fluffy French bread at home like it’s no big deal. You are guaranteed to win over everyone from newbies to kneading pros (Mel’s Kitchen Cafe).
Recipe Overview
Feature Details
| Feature | Details |
|---|---|
| Prep Time | 15 mins |
| Rise Time | 2 hours |
| Bake Time | 25-30 mins |
| Total Time | ~3 hours |
| Equipment | Mixer/Hands, Mixing Bowl, Baking Sheet |
| Yield | 2 Loaves |
Key Highlights
- Quick and Easy: You can knock out two lovely loaves in about 3 hours. The hands-on part is a breeze, even for starters.
- Flexible Mixing: You can go fancy with a big stand mixer or roll up your sleeves and knead by hand, whatever suits you (That Bread Lady).
- Fast Rising: Get that dough puffing quickly using an Instant Pot’s yogurt button, chopping proof time to about 30 mins (365 Days of Slow Cooking).
Don’t fret if you don’t have all the gizmos—just grab a bowl and wooden spoon, and you’re set! (Tastes Better From Scratch).
These French bread recipes offer many options for baking delicious, authentic loaves in your kitchen. Whether adding flair with a gourmet taste or sticking to the basics for solid homemade bread, these recipes lay an excellent foundation for tasty success. Who doesn’t love a slice of warm, fresh bread?
Baking Techniques and Tips
Busting out a French bread loaf that’s the envy of the neighbourhood bakery isn’t as complicated as it seems. Just a few insider tricks and touches can make all the difference. Let’s get cozy with some baker’s wisdom: eyeballing flour like a pro, letting your dough rise with style, and how to slash that dough like an artist.
Flour Judging and Consistency
How do you know if you’ve nailed the flour game? It isn’t just about sticking to the script of your recipe. It’s all about feeling and finessing. Humidity, altitude, and even how cozy your kitchen is can throw your dough for a loop. So ditch the measuring cup; get your hands in there!
- Dough should leave your hands a little tacky—think Post-it note, not flypaper.
- Don’t dump in flour like it’s on sale! Too much can squash your bread dreams.
- Keep a cup of flour back and introduce it slowly as you mix until it feels just right.
| Consistency | Description |
|---|---|
| Slightly Sticky | Perfect; dough clings a bit but behaves itself. |
| Too Dry | Needs a drink; gets you heavy, brick bread. |
| Too Wet | Needs more flour; it’s a gooey mess. |
Rising Methods and Techniques
Rising dough is like fine wine—it needs time, but sometimes you’re in a rush. Whether you’ve got all day or just a coffee break window, there’s a method for you.
- Quick 10-Minute Increment Rising Method:
- It gives you lighter bread, perfect if you’re in a hurry.
- Traditional Rising Method:
- It takes love, time, and a bit more elbow grease, but oh boy, the payoff! Fluffy bread with oomph in every bite.
Importance of Scoring and Slashing
Before tossing your dough into that hot oven, there’s an art to slashing. Grab a bread lame and prepare to make your mark; it’s like bread’s signature.
- Why Scoring Matters:
- Let’s bread expand without cracking—nobody wants a bread implosion.
- It gives your loaf that Instagram-ready, rustic look.
- Stops surprise splits that sneak up in the oven.
For the lowdown on using a bread lame like a champ, check our section on Bread Lame and Its Role.
Armed with this know-how, you’re set to twist up some stellar homemade French bread. If you’re hungry for more, check out some fun twists with our French Bread Recipes and turn it up with our Pizza Bread Recipe, French Bread.
Baking Essentials
Ice Cubes for Steaming
Want the perfect Crust on your French bread? Ice cubes to the rescue! Before you start preheating your oven, pop a baking dish on that bottom rack. Once your oven feels like a sauna, toss in those ice cubes before you place your dough inside. The steam from the ice is your magic trick for nailing that crackly, golden Crust every baguette dreams of. Trust me, it’s a game-changer. Mel’s Kitchen Cafe
Equipment: Stand Mixer or Hand Kneading
Are you making that perfect loaf? You’ve got two paths: rock a stand mixer or get your hands sticky with hand kneading. A stand mixer, especially a beast like the Bosch Universal Plus, saves you time and sore arms. It’s got power and space to spare (That Bread Lady). But if you’re in the mood for some elbow grease, hand kneading gives you that comforting, old-school feel. Either way, you’re looking at less than 3 hours to dough heaven, with most of it just waiting for the dough to rise.
Here’s a peek at how each stacks up:
| Method | Pros | Cons |
|---|---|---|
| Stand Mixer | Quick and easy | Gotta buy the gear |
| Hand Kneading | Cheap and satisfying | A bit of a workout |
When that loaf’s out of the oven, slather a slice with butter, or if you’re feeling sweet, try some honey or strawberry jam. And hey, keep in the loop with tasty ideas by signing up for newsletters or following your favourite bakers online (I Heart Naptime).
Bread Lame and Its Role
Ever wonder how bakers get those fancy designs on bread? Enter the bread lame! Think of it as the artist’s brush for your dough – helping those loaves look good and rise like a champ. By scoring your dough, you’re preventing those awkward bread explosions and ensuring everything puffs up just as it should (Mel’s Kitchen Cafe).
Hungry for more? Explore our collection of French bread recipes and try fun twists like making French bread pizza. Your oven will thank you.
Perfecting the Dough
Creating the right dough sets your easy French bread recipe apart, transforming it from good to mouthwateringly amazing. Roll up your sleeves, and let’s make this bread unforgettable.
Gradual Flour Addition Tip
French bread’s secret partner is patience. Flour isn’t just dumped in; it’s sprinkled in with love. Keep that last cup for later use—add it slowly and by hand towards the end. Why? Dive in and experience the dough with your fingertips: slightly sticky but never gluey. It’s a balance—make it too dry, and you’ll wrestle it; too wet, and it slips right out of your hands. This tactile trick keeps dough at its best. (That Bread Lady)
Shaping and Handling After First Rise
After the dough’s initial rest, it’s ready for some magic. This is the stage where you gently coax the dough into shape. The dough matures at this phase, ready to form networks that give bread its beloved airy pockets. Here’s your goal: a gentle touch preserves those precious pockets that give your loaf its lift. Don’t bulldoze that dough after the first rise. Handle it delicately, and you’ll shape a cloud rather than a rock. (Bob’s Red Mill)
Benefits of Second Proofing
Double the rising? Double the perks. Letting your dough catch its breath a second time refines its inner life. The second round isn’t just a time-killer—it’s about that growth spurt, deepening flavours and fluffier bread. Here’s what you gain:
- Silky Texture: Round two creates a fine crumb that feels just right.
- Volume Boost: The dough climbs higher, giving your bread enviable fuzziness.
- Taste Explosion: More fermentation, more flavour—a win for your taste buds.
Are you eager for more? Check out our article on French bread recipes to finesse your Crust into a crispy masterpiece.
You’ll bake bread and craft a legend by dialling into these strategies. For more tips on achieving that perfect golden Crust, follow our guide on achieving a crispy Crust.
Achieving the Crispy Crust
Nailing that crispy Crust is like finding a hidden treasure for anyone trying to make killer French bread. Here’s the scoop on some must-do tricks and gear to get that tasty golden crunch.
French Loaf Pan vs. Baking Sheet
Think of a French loaf pan as the ultimate wingman if you want top-notch French bread. Known also as a channel pan, it’s like the superhero of pans with tiny holes that let air flow like a pro, making your Crust crispier than a winter morning. It helps your loaf keep its shape and still feel like a dream when you bite (That Bread Lady). Here’s a quick lowdown on what each piece of baking gear brings to the table:
| Baking Equipment | Pros | Cons |
|---|---|---|
| French Loaf Pan | Gives a crispy crunch; keeps the loaf looking fab | You might have to go hunt one down |
| Baking Sheet | Everyone has one; fits two loaves easy-peasy | Crust might not be as crunchy |
Can’t find a French loaf pan? No worries! A baking sheet lined with parchment can step in as the trusty sidekick. The parchment? It’s the unsung hero, keeping the dough from sticking and effortlessly handling two loaves (That Bread Lady).
Steam Creation for Golden Crust
Steam is like a secret handshake in the bread world. It lets that dough puff up before the Crust says, “I’m done,” giving you that golden, crunchy finish. A quick and nifty trick is tossing a few ice cubes into a hot pan at the bottom of your oven as you kick off your bake.
| Steam Method | Description |
|---|---|
| Ice Cubes | Toss a few icy cubes in a hot pan as your bake begins |
| Water Spritz | Spritz some water in the oven before and during the start of baking |
Both ways fill your oven with steam, doing wonders for that crispy, golden look and feel.
Baking Time and Crust Texture
How long and hot you cook your bread aren’t just numbers—they set the stage for your Crust’s destiny. Shoot 20-25 minutes with a typical French bread recipe at a sizzling 450°F. Keep your peepers on it as time winds down to ensure it looks like the stunning golden deliciousness you’ve dreamed of.
| Baking Parameter | Value |
|---|---|
| Oven Temperature | 450°F |
| Baking Time | 20-25 minutes |
Follow these steps like a treasure map, and your fluffy, crusty bread awaits at the end. Check out specific French bread recipes for more ways to get that perfect Crust. Up for a little experiment? Our French bread pizza recipe is also a fun twist!
Freezing and Storage
Mastering freezing and storage is critical to keeping your homemade French bread fresh and tasty. With some simple tricks, you can feast on your bread like you just baked it, even months later.
Freezing Technique and Duration
Want to stock up on French bread? Freeze it! Here’s how you do it:
- Once that bread is excellent as a cucumber, wrap it up tight in foil or plastic wrap.
- Slip it into a freezer-safe bag and put it into the cold box.
Our pals at I Heart Naptime reckon you can keep it in the freezer for up to two months, and when you take it out, it’ll still be good to go.
Got some dough you’re not ready to bake yet? No problem:
- Shape it into a loaf and pop it on a baking sheet.
- Freeze till solid, like your best-picked ice cube.
- Then, bag it up in a freezer-safe bag.
Stash that dough for up to three months. When you’re ready to indulge, let it defrost, let the yeast do its thing again, and bake it up nice and fresh (Tastes Better From Scratch).
| Storage Method | Duration |
|---|---|
| Fully Baked Bread | Up to 2 months |
| Dough (after first rise) | Up to 3 months |
Proper Storage Tips
Keeping your French bread pretty and tasty at room temp is just as easy:
- Tuck it in a paper bag or bread box to keep that Crust all crispy.
- Steer clear of plastic bags unless you like your bread with a side of sogginess.
If you’re not planning to gobble it up in a few days, freezing leftovers keeps the party going.
Thawing and Reheating Instructions
Bringing that frozen French bread back to its glory? Here’s how to do it right:
For baked bread:
- Take it out of the freezer while still all snug in its wrapping.
- Relax; let it thaw at room temp for a couple of hours.
- Crank the oven to 350°F (175°C).
- Let it warm and get crispy in the oven for 10-15 minutes.
For dough that needs some love:
- Move it from the freezer to the fridge the night before.
- Let it slowly come back to life overnight.
- Take it out, get it to room temp, and let it rise that second time before you bake it.
Nail these steps, and your French bread will taste like freshly baked. Do you have a thing for French bread? Check out our recipe or explore other delicious recipes.
Making the Process Easy
Whipping up some tasty, authentic French bread is a breeze—there’s no need for a culinary degree or a kitchen filled with gadgets. Let’s explore some tips to make the whole thing as smooth as butter.
Quick Recipe Preparation
This easy French bread recipe is ready in just 90 minutes, with you doing stuff for only about 15 minutes. The rest of the time, you’re just chillin’, letting the dough do its thing (I Heart Naptime). You’ll end up with two gorgeous loaves that are crunchy on the outside and soft, a little chewy on the inside.
Options for Mixing: Stand Mixer vs. Hand Mixing
Getting that dough just right is critical. Whether you’re a team stand mixer or a team hand mixer, both have their perks.
Stand Mixer
- Speeds things up
- Consistent, reliable results
- Saves your muscles
Hand Mixing
- Feel the dough, get it just right
- Intuitive feedback
- No fancy tools are needed
| Method | Pros | Cons |
|---|---|---|
| Stand Mixer | Quick and easy, consistent dough | Need a mixer, might rattle a bit |
| Hand Mixing | More control and feel | Can be tiring, takes longer |
Gradual Flour Addition
Don’t dump all the flour in at once—hold back a cup and add slowly at the end (That Bread Lady). Feel the dough; when it feels just right, you’ve nailed it.
Dealing with Limited Equipment
No stand mixer? No sweat. This easy French bread recipe is doable with stuff you’ve probably got lying around the kitchen.
Essential Equipment:
- Big mixing bowl
- Wooden spoon or a dough whisk
- A clean kitchen towel or some plastic wrap
- Baking sheet or a special loaf pan if you’ve got one
When doing it by hand, kneading is your best buddy. It helps the dough get that nice stretchy texture. If you’ve never done it before, just fold, press, turn, and repeat until it’s as smooth as a jazz concert.
This guide should make your foray into French bread as easy as pie, even if you’re just starting. For more baking hacks, check out our baking techniques and tips.
Bread Texture Tips
Nailing the perfect texture in your French bread is like capturing lightning in a bottle – it gives your loaf that real-deal feel. Here, we’ll spill the magic behind perfect bread texture: hydration, supercharging your dough and kneading the right way.
Proper Hydration for Texture
Just like plants need water, your dough depends on hydration to thrive. How much water you add dictates whether your bread has a cozy, soft feel or is like a brick. Increase the water, and watch your bread get those big, inviting holes and tenderness. Skimp on the moisture, and you’ll be slicing through something that feels more like a workout.
| Water Mix | Bread Texture | Results |
|---|---|---|
| Lots (70-80%) | Airy with Big Holes | Light and Fluffy |
| Less (50-60%) | Compact and Dense | Hearty and Heavy |
Upping the hydration can create a loaf that almost floats. Mind your flour and the weather, though! If you want to learn more about getting your dough just right, check out our guide on French bread recipes.
Using Dough Magic and Vital Wheat Gluten
Adding a sprinkle of dough enhancers like Vital Wheat Gluten can work wonders for your bread’s feel-good factor. Your buddy enhances elasticity, helping your dough trap all those lovely air bubbles while getting fluffier and soaring higher.
| Additive | What It Does | Impact |
|---|---|---|
| Vital Wheat Gluten | Boosts Elasticity | Fluffier, Taller Bread |
Toss in a tablespoon or two of this magic dust, and you’ll notice your bread boasting more height and fluffiness. Curious about other dough tricks? Check out our chat on using enhancers in our pizza bread recipe with French bread.
Kneading Techniques for Texture
Think of kneading as giving your dough a workout. It’s what pumps up the gluten and builds the bread’s backbone. Kneading creates those nifty air pockets that help your bread rise and get that airy vibe.
Go easy with the kneading, and you’ll end up with a loaf more flat than fab. Knead too much, and it’ll be like chewing on rubber. The sweet spot? It is a smooth, stretchy dough that is just a bit sticky.
| Kneading Duration | Gluten Muscle | Bread Feel |
|---|---|---|
| Not Enough | Floppy Gluten | Dense and Heavy |
| Just Right | Strong Gluten | Airy and Light |
| Too Much | Tough Gluten | Chewy and Tough |
Are you wondering if you’re done kneading? Do the windowpane check: stretch a bit of dough. If it forms a see-through film without snapping, you’re golden. For stand mixer peeps, knead for 5-7 minutes on medium. Are you going at it by hand? Try 10-15 minutes in your countertop gym. Hungry for more kneading know-how? Dig into our French bread recipe section.
Master the trio: hydration, dough enhancers, and kneading, and you’re on your way to the French bread greatness you’ve dreamed of. Perfect these, and you’ll be baking bread that gives the finest French bakeries a tip of the hat.
Ingredient Precision
Getting your ingredients right is your secret weapon for that French bread everyone dreams of. It’s all about nailing those measurements!
Importance of Accurate Measurement
Why bother with accuracy? Well, it’s the ticket to getting that perfect texture and taste in your bread. Measuring cups and spoons might seem convenient, but they’re not precise – they measure volume, not weight, which can throw your dough consistency off. But don’t worry, a trusty kitchen scale can save the day by weighing your ingredients in grams, so every loaf turns out just right (Bob’s Red Mill).
Advantages of Weighing Ingredients
Here’s why your scale could become your new best kitchen buddy instead of those dusty measuring cups:
- Consistency: Every loaf turns out with the same lovey-dovey flavour and texture.
- Accuracy: Precision makes sure nothing tastes off.
- Simplicity: Makes scaling up or down a breeze without your head spinning.
- Efficiency: Cuts down on little mistakes that can mess up your baking – every gram matters!
| Ingredient | Volume (cups) | Weight (grams) |
|---|---|---|
| All-Purpose Flour | 1 cup | 120g |
| Water | 1 cup | 240g |
| Sugar | 1 tablespoon | 12g |
| Salt | 1 teaspoon | 5g |
| Yeast | 1 packet | 7g |
Pantry Ingredient List and Adaptability
Our French bread recipe keeps things super simple. You won’t need milk, eggs, or butter – just a few good ol’ basics from the pantry make it easy-peasy and reliable (Tastes Better From Scratch). Here’s what you’ll need:
- All-Purpose Flour: Gives the bread its chewy character.
- Water: Wake-up call for the flour and yeast. The amount used decides how fluffy the bread will be.
- Sugar: Secret food for the yeast with just a dash of sweetness.
- Salt: Brings out flavours and keeps the gluten strong.
- Yeast: The magic that gets it all rising.
These pantry staples allow you to tweak the recipe to fit dietary needs or personal quirks. Check out our section on bread texture tips for making your bread turn out perfect every time.
Head over to baking techniques and tips for the inside scoop on baking like a pro. If you can’t get enough French bread, dive into our treasure trove of recipes for more mouthwatering ideas.
1 thought on “Mastering the Art: Easy French Bread Recipe for Beginners”